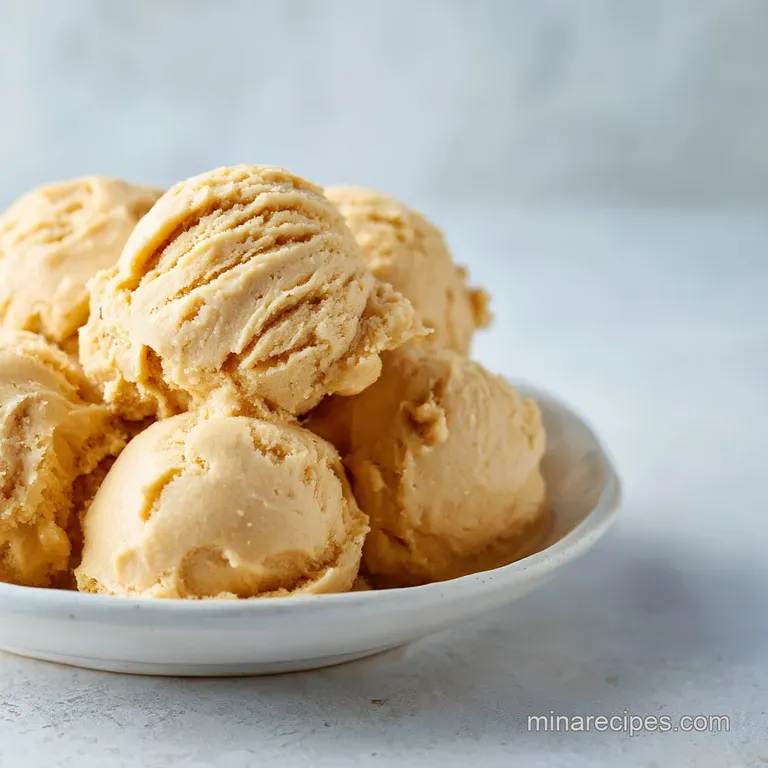
Edible Cookie Dough: Velvety and Buttery
- Time: 10 min active + 5 min heat treating = Total 15 minutes
- Flavor/Texture Hook: Velvety, buttery base with a satisfying snap from chocolate chips
- Perfect for: Late night cravings, movie marathons, or a kid friendly party treat
Grab a Spoon for Edible Cookie Dough
I remember the absolute chaos of my grandmother's kitchen during December. The air would be thick with the scent of cinnamon and toasted nuts, but the real prize wasn't the finished cookies. It was the bowl.
We’d all huddle around, eyes wide, waiting for that one moment when she’d let us "clean the bowl" with a spoon. It was a rite of passage, a little bit rebellious, and tasted like pure childhood.
But as I got older, I started hearing all those warnings about raw flour and eggs. Honestly, it felt like a crime to give up that specific, gritty, sweet joy of raw dough. I spent a while trying to find a version that didn't taste like a chemistry project or a health food store substitute.
I wanted that rustic, comforting feel the kind where you don't care if the scoops are uneven as long as the flavor is front and center.
This is the version I stick to now. It's uncomplicated and doesn't require any fancy equipment. We're skipping the eggs entirely and using a quick microwave trick to make the flour safe. You get that same velvety texture and nostalgic sweetness, but you can actually share it with people without a side of anxiety.
Trust me on this, it's the only way to do it.
Quick Stats for Your Batch
Before we dive into the mixing, let's look at the logistics. Since this is a no bake treat, we aren't worrying about oven temps or cooling racks. It's all about the prep and the patience while the flour cools. If you're planning this for a party, it's a brilliant make-ahead option.
The timing is tight, but that 5 minute cook time is specifically for the flour safety step. Once that's done, it's a fast process. Because there's no baking involved, you don't have to worry about the dough spreading or the edges burning. It's just pure, unadulterated dough from start to finish.
| Servings | Ingredient Adjustments | Pan Size | Total Time |
|---|---|---|---|
| 4 people | 1/3 cup butter, 1/2 cup brown sugar | Small bowl | 15 minutes |
| 12 people | Full recipe (as listed) | Medium bowl | 15 minutes |
| 24 people | 1 cup butter, 1.5 cups brown sugar | Large bowl | 20 minutes |
Right then, let's get into the nitty gritty of why this actually works. We aren't just mixing things together; we're replacing the structural roles that eggs usually play in a baked cookie.
Why This Works
Since we aren't putting this in the oven, we don't need the "lift" that eggs and baking soda provide. Instead, we focus on the mouthfeel.
- Flour Safety: Heating the flour to 160°F kills any potential bacteria, making it safe to eat raw.
- Fat Binding: Softened butter acts as the glue, holding the sugars and flour together in a velvety mass.
- Sugar Texture: The mix of brown and white sugar ensures a deep, molasses like flavor without making the dough too grainy.
- Moisture Balance: A small splash of milk replaces the liquid from the eggs, keeping the dough from becoming a dry paste.
If you love the idea of a no bake treat, you might also enjoy these Lunch Lady Peanut Butter Bars, which use a similar "no oven" philosophy to get a rich, dense result.
| Ingredient | Science Role | Pro Secret |
|---|---|---|
| Unsalted Butter | Texture Base | Keep it soft, not melted, for a fluffier dough |
| Brown Sugar | Moisture & Flavor | Packed tight to ensure the right molasses ratio |
| Heat Treated Flour | Structural Body | Let it cool completely or it will melt the butter |
| Milk | Liquid Binder | Use whole milk for a creamier, richer finish |
The Goods for the Bowl
Don't bother with low-fat alternatives here. This is a comfort food, and the fat is what carries the vanilla and sugar flavors across your palate. I've found that using a high-quality unsalted butter makes a huge difference you can control the salt yourself.
For the Dough Base
- 1/2 cup (115g) unsalted butter, softenedWhy this? Creates the velvety, creamy foundation
- 3/4 cup (150g) brown sugar, packedWhy this? Adds depth and a chewy feel
- 1/4 cup (50g) granulated sugarWhy this? Adds a bit of crystalline snap
- 2 tbsp (30ml) milkWhy this? Replaces egg moisture
- 1 tsp (5ml) vanilla extractWhy this? Essential for that classic cookie aroma
- 1 cup (125g) all purpose flourWhy this? Provides the bulk and structure
- 1/4 tsp (1.5g) saltWhy this? Cuts through the sugar intensity
For the Mix ins - 3/4 cup (130g) semi sweet chocolate chips Why this? Provides a bitter contrast to the sweet dough
Smart Swaps
Sometimes you don't have everything in the pantry. That's fine. Most of these can be swapped, but be mindful of how it changes the texture.
| Original Ingredient | Substitute | Why It Works |
|---|---|---|
| Semi Sweet Chips | White Chocolate Chips | Same fat content. Note: Makes the dough significantly sweeter |
| All Purpose Flour | Oat Flour | gluten-free option. Note: Denser, heartier texture |
| Whole Milk | Almond Milk | Liquid replacement. Note: Slightly thinner consistency |
| Brown Sugar | Coconut Sugar | Similar molasses notes. Note: More rustic, earthy flavor |
Now, you don't need a professional kitchen to pull this off. A few basic tools will do the trick. I prefer a hand mixer for the butter and sugar, but if you've got strong arms and a sturdy spoon, you can do it by hand.
Tools to Get It Done
Keep it simple. You don't need a stand mixer for this. A medium sized mixing bowl is your best friend here. Make sure it's large enough that you can fold in the chocolate chips without them flying across the room.
You'll also need a microwave safe bowl specifically for the flour. This is a critical point: don't use the same bowl you're mixing the butter in until the flour has cooled down. If you add hot flour to softened butter, you'll end up with a greasy soup instead of a dough.
Finally,, grab an instant read thermometer. I know it feels a bit fussy, but when it comes to raw flour, we want to be sure it hit that 160°F mark. It's a small price to pay for peace of mind.
Putting the Mix Together
Let's crack on. This process is quick, but the order of operations matters. If you rush the creaming process, the dough will feel grainy. If you overmix the flour, it can get a bit gummy.
Phase 1: The Safety Step
Place your 1 cup of all purpose flour in a microwave safe bowl. Heat it in 30 second intervals. Between each burst, give it a good stir to prevent hot spots. Use your thermometer to check the center. Once it reaches 160°F (71°C), stop immediately.
Now, the hard part: let it cool completely. If you're in a rush, pop it in the freezer for 5 minutes.
Phase 2: The Creaming Process
In your main mixing bowl, beat the 1/2 cup of softened butter, 3/4 cup of brown sugar, and 1/4 cup of granulated sugar. Use medium high speed until the mixture looks pale and fluffy. You're looking for a velvety consistency here.
This is where the air gets whipped in, making the dough feel light rather than like a heavy paste.
Phase 3: Folding and Finishing
Stir in the 2 tbsp of milk and 1 tsp of vanilla extract. Mix until the base is smooth and glossy. Now, sift in your cooled, heat treated flour and 1/4 tsp of salt. Turn your mixer to low speed and mix just until the flour disappears. Don't overwork it.
Finally, fold in the 3/4 cup of chocolate chips by hand using a spatula.
Fixing Your Dough Drama
Even with a simple recipe, things can go sideways. Usually, it comes down to temperature or measurement. If your dough feels "off," don't panic. Most of it can be fixed with a teaspoon of milk or a few minutes in the fridge.
Troubleshooting Common Issues
| Issue | Solution |
|---|---|
| Why Your Dough Is Too Crumbly | If the dough won't hold together and looks like wet sand, you likely had too much flour or your butter was too cold. The fat isn't emulsifying with the sugars. Adding a tiny bit of milk, one teaspoon |
| Why the Texture Is Greasy | This happens when the butter melts instead of creams. Either the butter was too soft to start with, or you added the flour while it was still hot. If this happens, chill the whole bowl in the fridge f |
| Why It Tastes "Raw" | If you can still taste the raw, starchy flavor of flour, it probably didn't hit 160°F. While you can't "re heat" the dough once it's mixed, you can mask this in the future by adding a pinch more salt |
Twists on the Classic
Once you've got the base down, you can really play around with this. Since it's an edible cookie dough recipe easy enough for anyone, it's the perfect canvas for experimentations.
If you want something more "adult," try adding a pinch of espresso powder. It deepens the chocolate flavor and cuts through the sweetness. For a festive vibe, swap the chocolate chips for crushed peppermint or dried cranberries.
Some people love adding a swirl of peanut butter, which turns this into a bit of a hybrid treat.
It's interesting to compare this to a Pizza Dough Recipe, where the goal is gluten development and yeast fermentation. Here, we want the opposite minimal gluten and zero fermentation. We want it stable, sweet, and ready to eat immediately.
| Premium | Budget | Flavor Impact | Savings |
|---|---|---|---|
| Pure Vanilla Bean Paste | Vanilla Extract | More intense, visible seeds | Save $5-10 |
| Ghirardelli Chips | Store Brand Chips | Slightly smoother melt | Save $2-4 |
| European Style Butter | Standard Unsalted | Richer, creamier mouthfeel | Save $1-3 |
Keeping the Dough Fresh
Because this contains dairy (butter and milk), you can't just leave it on the counter for a week. It needs to stay cool to maintain that velvety texture and safety.
Fridge Storage Store the dough in an airtight container or a glass jar. It'll stay fresh for about 5 days. I find that the flavors actually meld better after a few hours in the fridge, so if you can resist, let it sit for a bit.
Freezer Guide This stuff freezes beautifully. I like to scoop the dough into small balls and freeze them on a parchment lined tray before transferring them to a freezer bag. This way, you can just grab one "bite" whenever the craving hits. They'll last for 3 months.
To thaw, just let one sit in the fridge overnight or for 30 minutes on the counter.
Zero Waste Tip If you have a little bit of dough stuck to the sides of the bowl, don't waste it. Add a splash of milk and a tiny bit of maple syrup to the bowl, stir it up, and use it as a dip for apple slices.
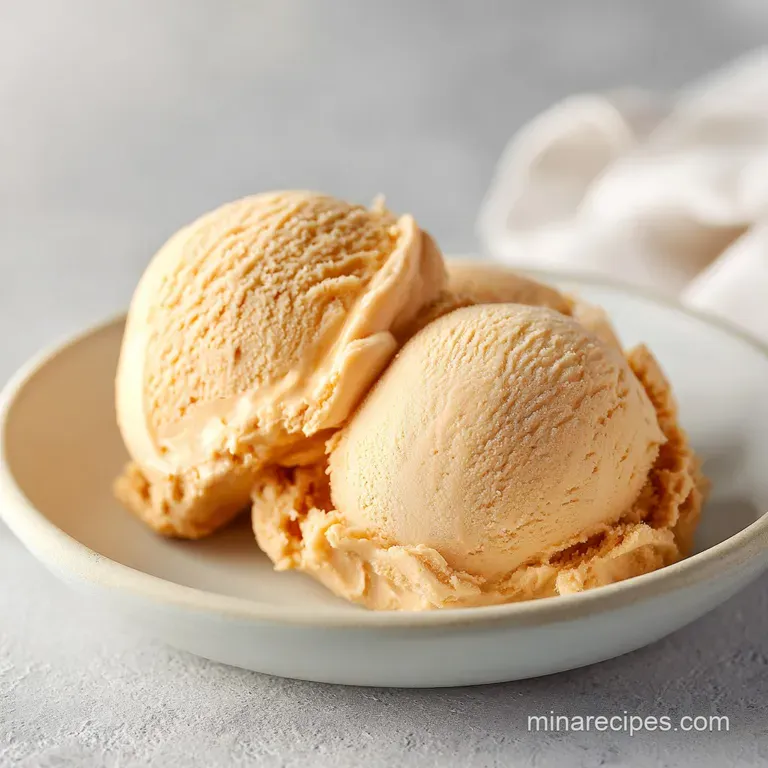
Ways to Serve This
Since this is occasion ready, how you present it matters. You can keep it rustic by just serving it in a bowl with a spoon, but if you're hosting, you can dress it up.
The Ultimate Sundae Place a generous scoop of the dough at the bottom of a glass. Top it with warm fudge, a scoop of vanilla bean ice cream, and a sprinkle of crushed walnuts. The contrast between the cold dough and warm sauce is incredible.
Dough Bites Roll the dough into small, one inch balls. Roll these in cocoa powder, sprinkles, or crushed graham crackers. Serve them on a platter with toothpicks for an easy party appetizer that always disappears in minutes.
Fruit Pairing If the sweetness is a bit much, pair a scoop of the dough with tart Granny Smith apple slices or fresh raspberries. The acidity of the fruit cuts through the richness of the butter, making it feel a bit lighter.
Recipe FAQs
Is there any cookie dough that is edible?
Yes, provided it contains no raw eggs and the flour is heat treated. This removes the risks of Salmonella and E. coli typically found in raw dough.
Is it okay to eat edible raw cookie dough?
Yes, because the dangerous elements of standard dough are removed. This recipe is safe since it excludes eggs and treats the flour to kill bacteria.
How to create edible cookie dough?
Heat flour to 160°F in 30-second microwave intervals. Cream together butter and sugars, stir in milk and vanilla, mix in the heat treated flour and salt, then fold in chocolate chips.
How to make edible cookie dough with only three ingredients?
Combine softened butter, brown sugar, and heat treated flour. This uses the core components of the official recipe to create a basic edible base.
Why is my cookie dough too crumbly?
Stir in one teaspoon of milk. This happens if the butter was too cold or too much flour was added, preventing the fat from emulsifying with the sugars.
Why is the texture of my dough greasy?
Chill the entire bowl in the fridge. This occurs when the butter melts instead of creaming or if the flour was stirred in while still hot.
Is it true that all raw cookie dough is safe to eat?
No, this is a common misconception. Standard cookie dough contains raw eggs and raw flour, both of which can carry harmful bacteria.
Edible Cookie Dough Recipe